
Adult Take-and-Make Kit
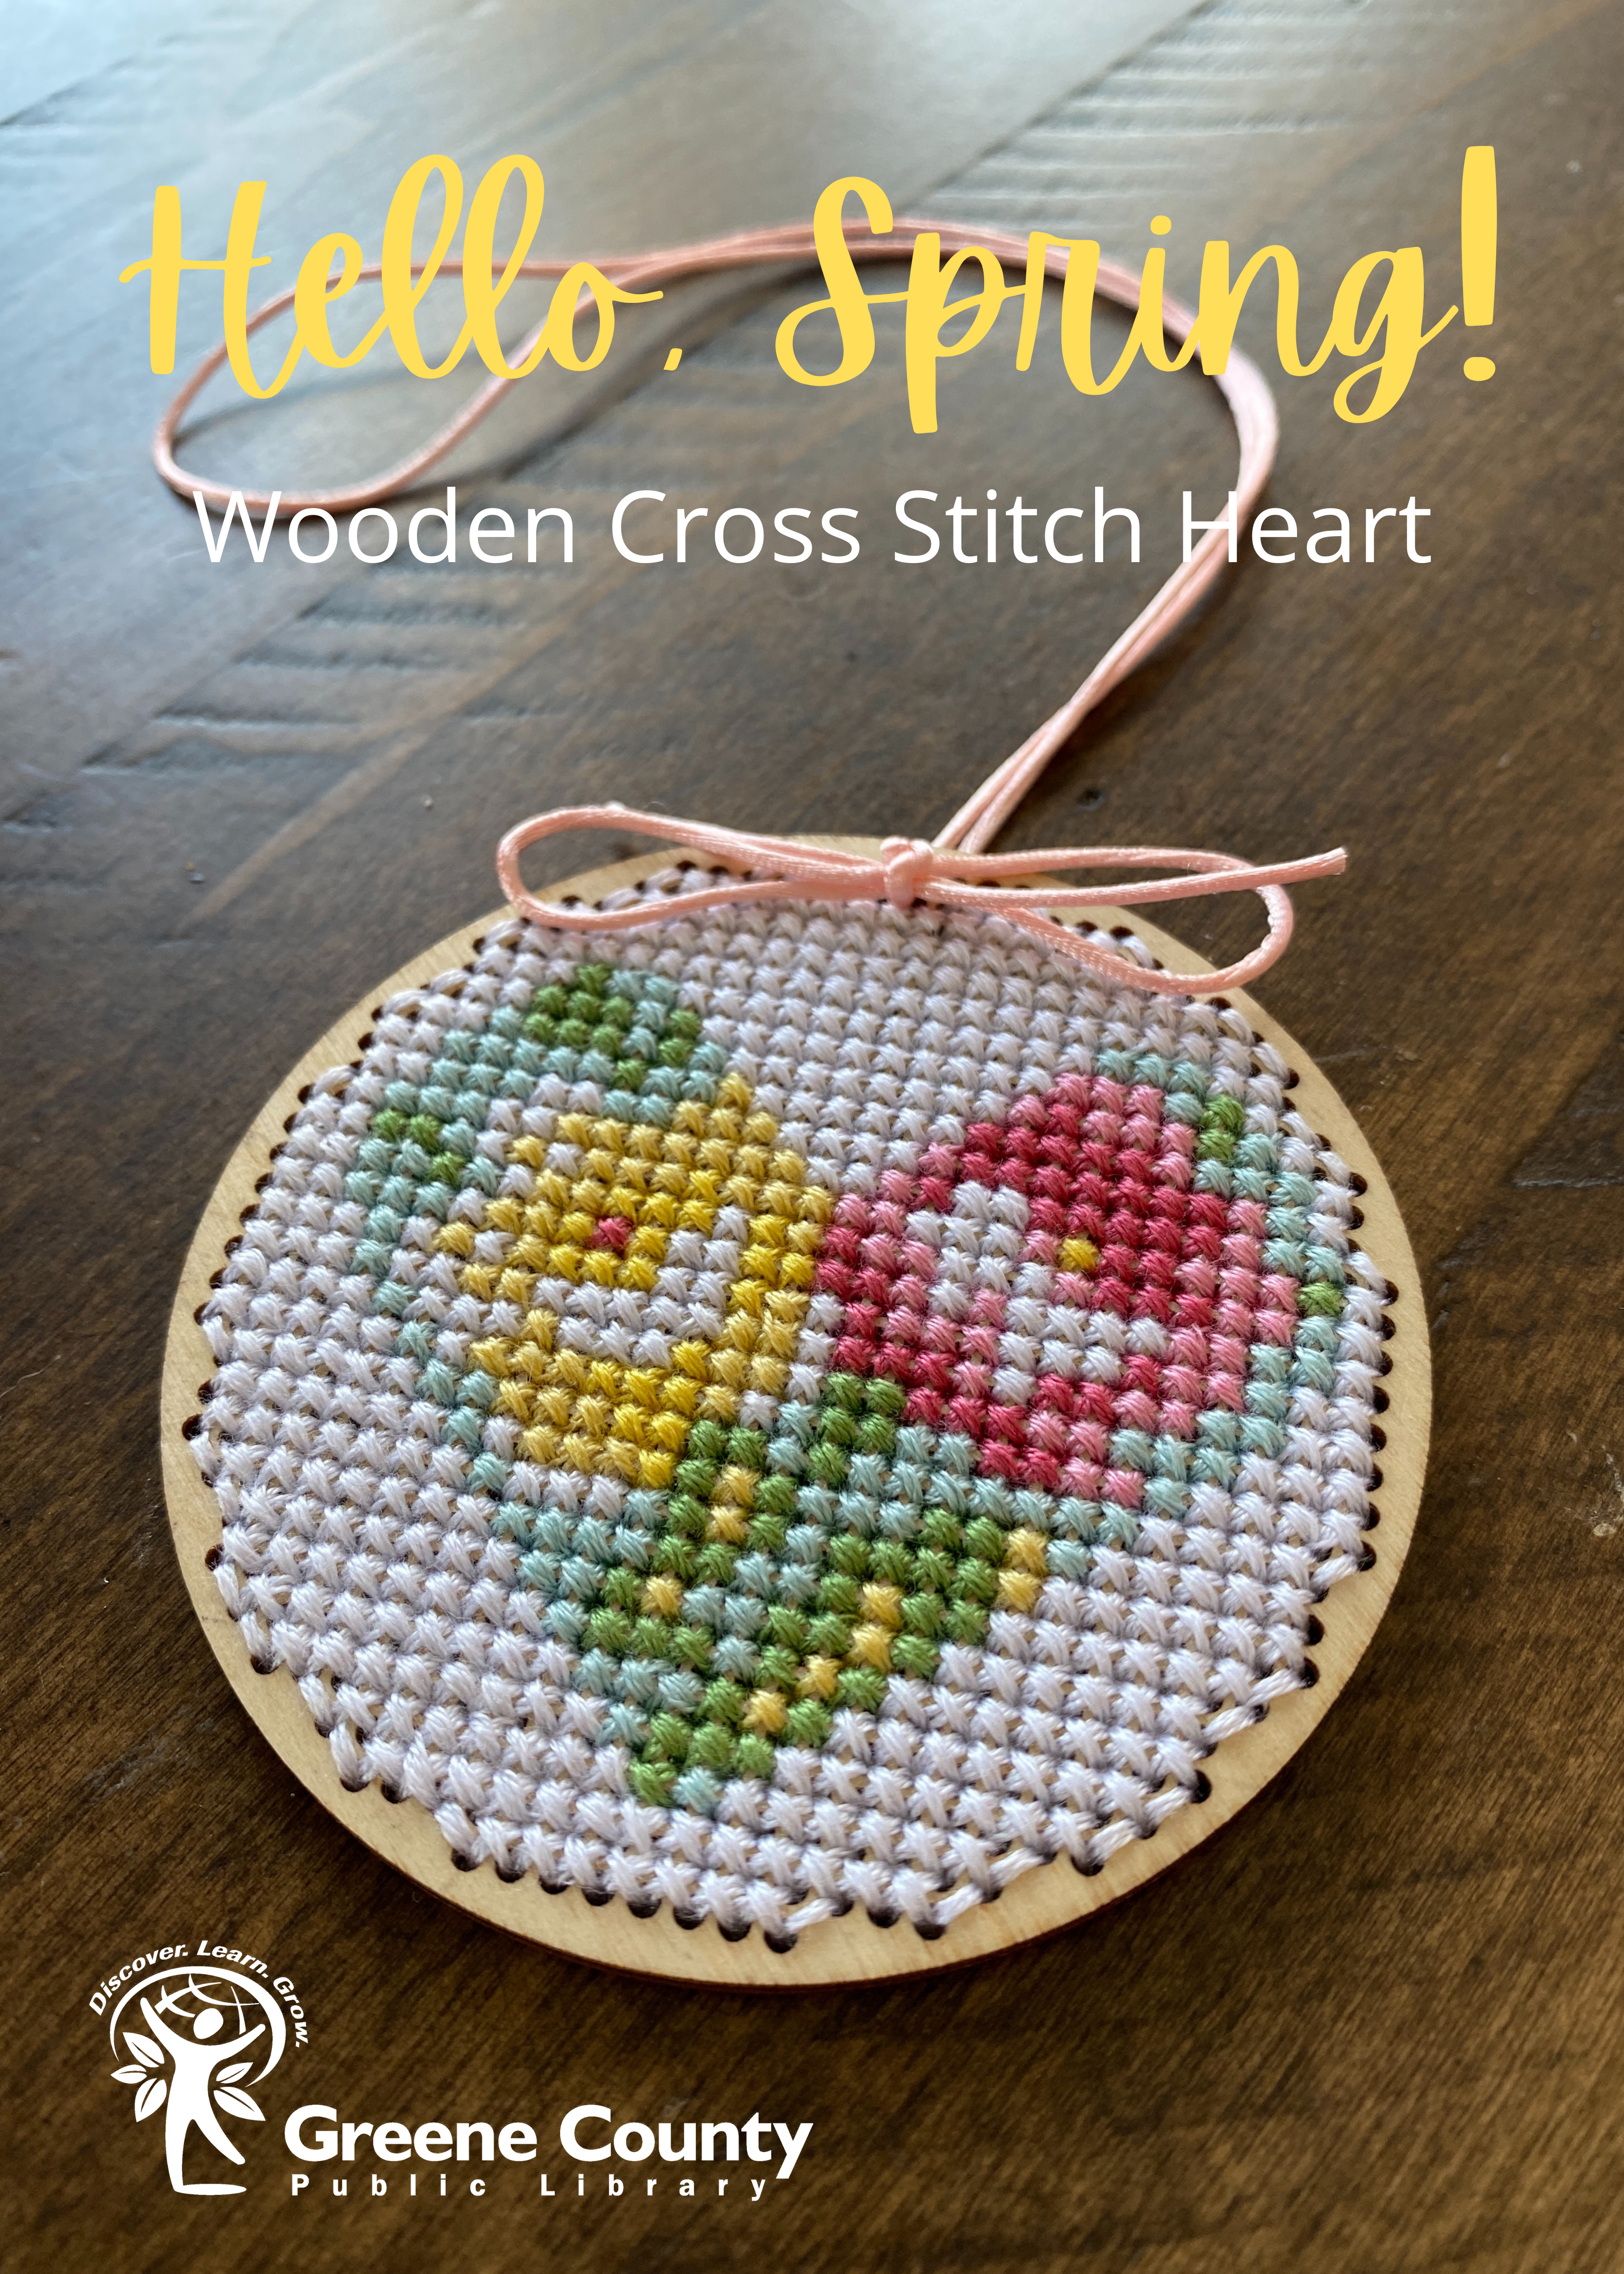
Welcome to Beavercreek Library’s “Spring cross stitch heart” adult take-and-make! We’ve got you covered whether you’re a seasoned pro or a brand new cross stitcher.
We’ll provide you with all the resources you need to create this adorable wooden heart.
Completing your project is as simple as 1, 2, 3…4!
1. Make sure you register for this take-and-make program to reserve your kit.
Do that here: https://greenelibrary.bibliocommons.com/events/search/index/event/603d1e38f9ff4a3a0022fd32
2. Pick up your project materials at the Adult Services Desk of the Beavercreek Library.
3. Complete your project using the instructions below.
4. Post your completed project on the Greene County Public Library (Beavercreek) Facebook page!

First things first…If you haven’t already, please pick up your materials from the Beavercreek Library’s Adult Services Desk. Once you have your kit, continue below for instruction on how to complete your project.
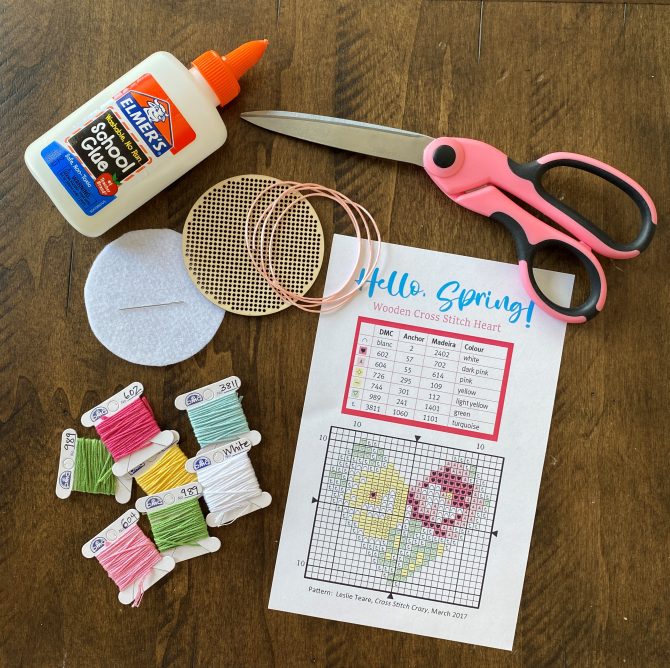
Supplies:
Provided in kit:
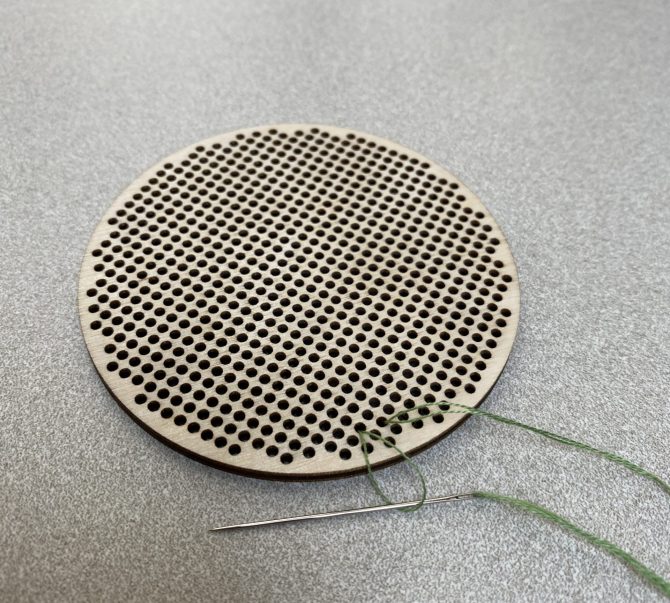
Wooden blank
DMC embroidery floss
Needle
Felt backing
Ribbon
Pattern
Not provided in kit:
Scissors
Glue (I used regular Elmer’s school glue)
Tape
Cross Stitch Basics
How to Read a Cross Stitch Pattern:
Getting Started:
Project Instructions:
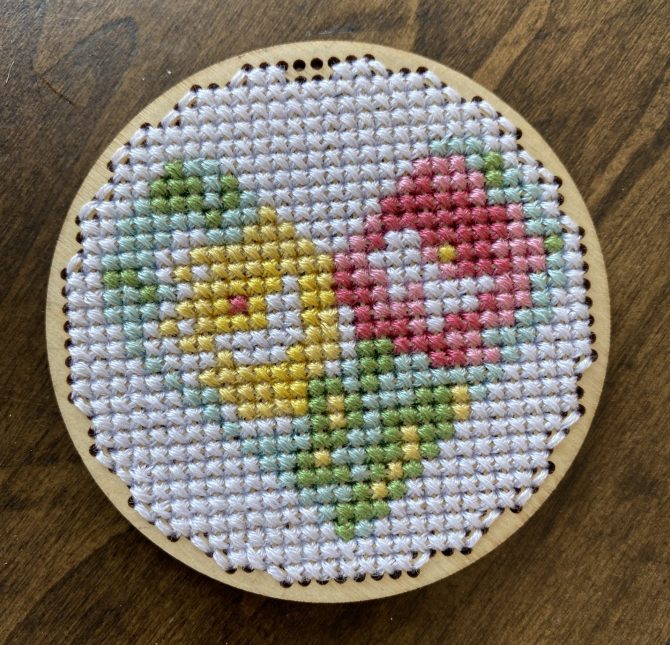
1. I started stitching with the light blue color floss (3811). Take a look at the picture below to see which hole to start on. The heart will not be perfectly centered on the wooden blank (I’m sorry if that makes you crazy, like it did me) Once you stitch all the white around it, it’s not that noticeable.
These stitches are made using 4 strands of floss. I accomplish this by taking 2 very long pieces of floss and folding them in half (making 4 strands). When folded, the floss is roughly the length of my arm (shoulder to wrist).
On the first stitch, I put the needle through the back and pull the thread almost all the way until there is a loop on the back. Then I put the needle through the hole from the front and insert the needle through the loop at the back and pull through (see picture). This way, the threads on the back stay nice and flat and you don’t have to worry about a knot coming through the (rather large) holes in the blank.
When I have finished with a length of floss, I thread the needle under some stitches before making a knot. Since you’ll be gluing felt on the back, you could skip a knot if you thread the tail through several stitches, but that’s a personal call.

2. Once you’ve finished stitching the color heart, fill in with the white if you choose. Use half stitches where there aren’t enough holes for a full stitch. Leave two stitches at the top empty so you can thread the ribbon through (see picture).
3. Cut the ribbon to the length you want and thread through the back. I put pieces of tape on the end of the ribbon and cut them to points so I could thread it through the holes (see picture). Then I just cut off the taped ends.


Make a knot and then tie a bow.
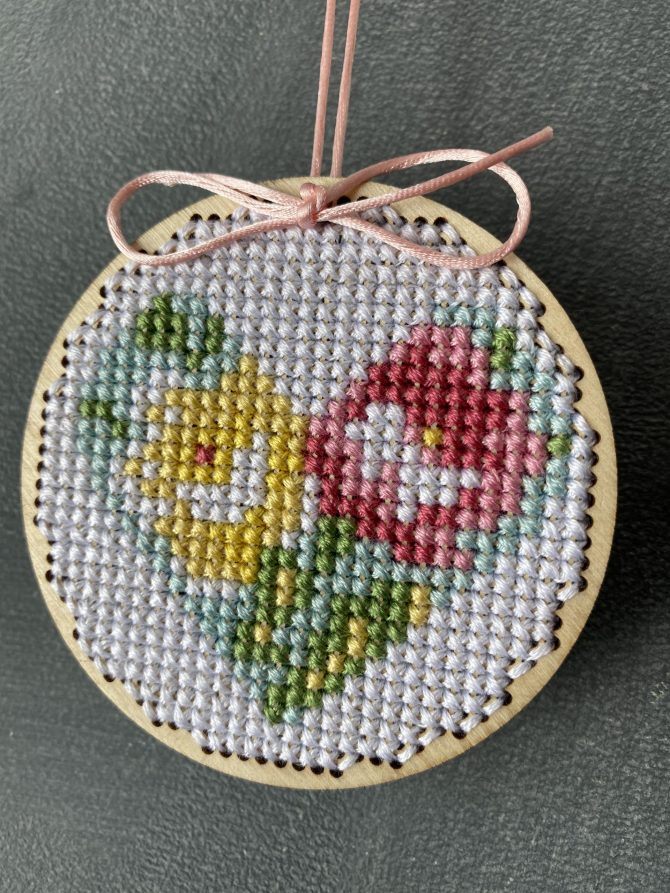
4. Spread a thin layer of glue on the felt and affix it to the back of the wooden circle. Voila!
5. Hang and enjoy!


Add a comment to: Beavercreek Adult Take-and-Make: Spring Cross Stitch Heart